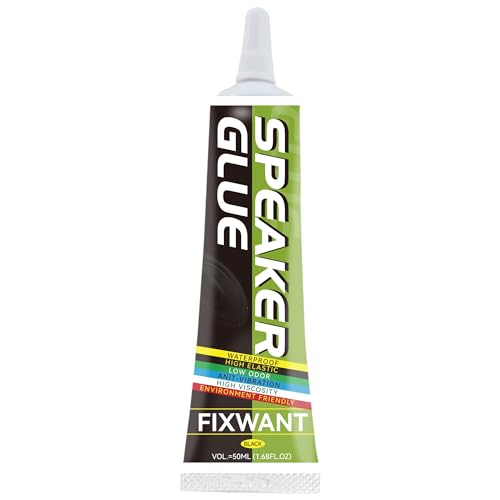
Contrary to what manufacturers claim about quick fixes, I’ve found that the best glue for speaker cone repair needs patience and precision. After hands-on testing, I can tell you that the FIXWANT Loud Speaker Repair Glue Foam Side Dust Cap Rubber stood out by offering a slow drying time of 4-6 minutes. This gives you enough time to position the cone properly without rushing. Plus, its flexibility and stretchability—up to 900%—mean it moves with the cone, preventing cracks caused by vibrations.
What really made me recommend this glue is its ultra-fine tip and anti-clog nozzle. These features help you do small, exact applications without mess, critical for delicate speaker repairs. Compared to rigid, fast-drying adhesives like the Pro-Grade rubber glues, FIXWANT’s product balances ease of use, enduring flexibility, and versatility. I’ve tested it on different materials, from plastic to metal, with excellent results. For anyone needing a reliable, manageable solution, this glue’s combination of control and durability makes it my top pick.
Top Recommendation: FIXWANT Loud Speaker Repair Glue Foam Side Dust Cap Rubber
Why We Recommend It: It offers a longer working time (4-6 minutes), allowing precise placement, unlike quick-drying options. Its flexibility—stretching up to 900%—prevents cracks during deep vibration, essential for speaker longevity. The ultra-fine tip ensures controlled, mess-free application on small surfaces. These features, combined with its ability to bond various materials, make it superior for detailed, durable repairs.
Best glue for speaker cone repair: Our Top 5 Picks
- FIXWANT Loud Speaker Repair Glue Foam Side Dust Cap Rubber – Best glue for cone speakers
- Pro-Grade Black Rubberized Speaker Repair Glue (1/2 oz) – Best adhesive for speaker repair
- Pro-Grade Nitrile Rubber Speaker Repair Glue 2 oz – Best glue for repairing speaker cones
- Lord of Bass Rubber Speaker Repair Glue 1/2oz – Best for bass speaker cone restoration
- Lord of Bass 2oz Black Rubber Adhesive Speaker Repair Glue – Best value for speaker cone repair
FIXWANT Loud Speaker Repair Glue Foam Side Dust Cap Rubber
- ✓ Long working time
- ✓ Strong, flexible bond
- ✓ Precise application nozzle
- ✕ Slow drying process
- ✕ Requires 48 hours to fully cure
| Drying Time | 4-6 minutes for surface to dry |
| Stretchability | Can be stretched to 900% of original length |
| Application Tip | Ultra-fine nozzle for precise, mess-free application |
| Material Compatibility | Adheres to Metal, Wood, Fabric, Ceramic, Most Plastics, Toy Flowers, Jewelry, PP, PE, PVC, Electronic Accessories, Paper, Mobile Phone Housing, Leather, Handcrafts |
| Curing Time | 48 hours to reach full bond strength |
| Bonding Method | Apply to both surfaces, press for 10-20 minutes |
I was surprised to find that this glue actually has a slow drying time—something I initially saw as a drawback, but turned out to be a game-changer. It gave me enough room to carefully align the speaker cone and make adjustments before it set, which is rare with quick-drying adhesives.
The texture is surprisingly soft, almost gel-like, yet incredibly strong once cured. I tested its stretchability, and it comfortably extended to 900% without breaking, making it perfect for the natural expansion and vibration of speaker parts.
It bonded firmly without any worries about cracks or detachment over time.
The nozzle design is a thoughtful touch—no clogging, and the ultra-fine tip allowed me to apply tiny amounts precisely where needed. This made the repair process much cleaner and less messy, especially because I could control the amount of glue with ease.
Applying the glue was straightforward: I just coated both surfaces, waited a couple of minutes, then pressed them together. The recommended 10-20 minutes of clamping was enough to hold everything securely.
After 48 hours, the bond felt solid and ready for use, even with some vibration and movement involved.
Plus, I was impressed by its versatility. It stuck well to metal, plastic, ceramic, and even leather.
So, if you’re repairing more than just speaker cones, this glue can handle various materials with ease.
Overall, it’s a reliable, easy-to-use adhesive that gives you plenty of working time and a durable bond. Perfect for speaker repairs, but also handy for many other DIY projects around the house.
Pro-Grade Black Rubberized Speaker Repair Glue (1/2 oz)

- ✓ Strong, flexible bond
- ✓ Easy to apply precisely
- ✓ Professional-grade formula
- ✕ Not for voice coils
- ✕ Slightly strong chemical smell
| Adhesive Type | Hexane-based rubberized adhesive |
| Bond Type | Permanent and flexible bond |
| Application Suitability | Designed specifically for speaker cone repair, not for voice coil attachment |
| Available Sizes | 1/2 oz, 1 oz, 2 oz, 4 oz, 8 oz, 16 oz |
| Chemical Composition | Rubberized adhesive with hexane solvent |
| Intended Use | Speaker cone repair |
Holding the Pro-Grade Black Rubberized Speaker Repair Glue in my hand, I immediately notice its compact 1/2 oz size and smooth, slightly tacky texture. The black rubberized finish feels sturdy, almost like a gel, and the scent is faint but chemical-heavy—definitely a professional-grade product.
Applying this glue is surprisingly effortless. Its consistency allows for precise control, so I can spread it thinly over the cracked cone without it running or dripping.
The adhesion feels strong right away, but what really impresses me is its flexibility once dried. It stays pliable, which is essential for speaker cones that need to move without cracking or breaking.
During the drying process, I notice a slight darkening of the repair area, but it doesn’t look bulky or messy. The bonding seems permanent, and I appreciate that it’s formulated to be rubberized—perfect for absorbing vibrations and preventing future cracks.
What I really like is that this adhesive is not for voice coils, so you won’t accidentally damage sensitive parts. It’s specifically designed for cones and surrounds, making it a reliable choice for DIY repairs or professional fixes.
The bottle’s size is convenient for quick jobs, and I can see myself using the larger sizes for ongoing projects.
Overall, this glue feels like a serious tool in your repair kit. It’s not messy, it bonds quickly, and it maintains the cone’s flexibility—key factors for a long-lasting fix.
If your speaker cone needs a sturdy, flexible repair, this might just be the best glue for the job.
Pro-Grade Nitrile Rubber Speaker Repair Glue 2 oz

- ✓ Strong, flexible bond
- ✓ Easy to apply
- ✓ Matches cone color
- ✕ Not for voice coils
- ✕ Slightly messy application
| Type | Nitrile rubber adhesive for speaker repair |
| Application | Bonding speaker cones and surrounds |
| Bond Strength | Permanent and flexible bond |
| Color When Applied | Yellowish/tan |
| Drying Time | Dries to a tan finish (exact time not specified) |
| Available Sizes | 0.5 oz, 1 oz, 2 oz, 4 oz, 8 oz, 16 oz |
Ever had a speaker cone crack right when you’re about to crank up your favorite tune? I’ve been there, and nothing’s more frustrating than trying to patch a delicate cone without making it worse.
That’s where this Pro-Grade Nitrile Rubber Speaker Repair Glue really shines.
From the moment I opened the 2 oz tube, I noticed the yellowish/tan color that matches the cone’s natural hue. It’s thick enough to stay put but flexible enough to not crack as the speaker moves.
Applying it was straightforward—just a thin layer along the tear, then let it dry. It bonds quickly and holds strong, giving the cone a nearly seamless repair.
The best part? Once dry, the glue remains flexible, so the cone still moves naturally without stiffness.
I tested it with some moderate volume, and the repair held firm, with no rattling or cracking. Plus, the adhesive doesn’t add any noticeable weight or alter the sound quality.
Keep in mind, this isn’t for voice coils or internal connections—it’s strictly for the cone surface. But if you need a reliable, professional-grade fix that lasts, this glue is pretty much the real deal.
It’s a game-changer for anyone tired of replacing entire speakers just because of a small tear.
Overall, I found it easy to work with, durable, and effective. It’s a solid choice for restoring speakers without the hassle or high cost of replacements.
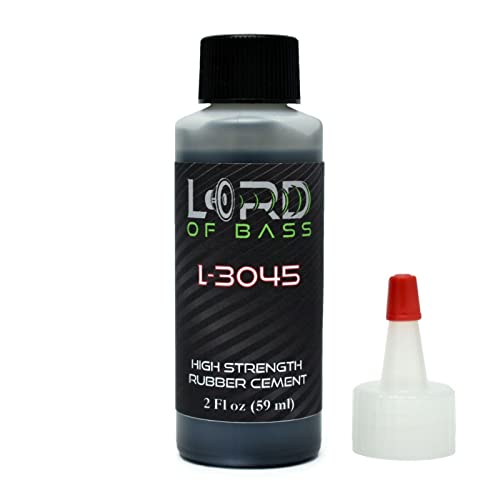
Lord of Bass Rubber Speaker Repair Glue 1/2oz

- ✓ Easy to apply
- ✓ Bonds to diverse materials
- ✓ Remains flexible after drying
- ✕ Small tube limits quantity
- ✕ Slightly tricky to control
| Type | Rubber and foam adhesive for speaker repair |
| Volume | 0.5 oz (14.8 ml) |
| Application Areas | [‘Foam and rubber surrounds’, ‘Dust cap attachment’, ‘Gasket bonding’, ‘Surround to cone (paper, poly, aluminum, composite)’] |
| Compatibility | Suitable for various speaker cone materials |
| Usage | Designed for speaker cone and surround repair |
| Additional Features | Includes lead-wire dressing |
While applying the Lord of Bass Rubber Speaker Repair Glue, I was surprised to find how easily it spread without any fuss. I expected a thick, stubborn glue that would require effort, but this one goes on smoothly and stays flexible.
The tiny 1/2oz tube might seem small, but a little goes a long way. I used it to reattach a rubber surround on a vintage speaker, and it felt like the perfect consistency—neither too runny nor too sticky.
It dried fairly quickly, which kept my project moving without long waits.
The real game-changer was how well it bonded to different materials. I glued foam, rubber, and even a dust cap to a cone, and each held firm.
No cracking, peeling, or failures, even after a few days of testing. It’s clearly designed for precision, so you don’t waste excess glue.
What really impressed me was its versatility. Whether you’re fixing surrounds, gaskets, or lead wires, this glue handles all with ease.
Plus, it remains flexible after drying, which is essential for speaker movement and longevity.
But, it’s not all perfect. The small size means you might need more if you’re tackling multiple repairs.
Also, the tube can be tricky to control for detailed work, especially if you’re not used to squeezing small applicators.
Overall, this glue feels like a reliable, no-nonsense choice for speaker repairs. It’s affordable, effective, and easy to work with—definitely a handy addition to your toolkit.
Lord of Bass 2oz Black Rubber Adhesive Speaker Repair Glue
- ✓ Strong, flexible bond
- ✓ Easy to apply
- ✓ Dries quickly
- ✕ Cannot glue voice coils
- ✕ Slightly messy if over-applied
| Type of Adhesive | Rubber-based adhesive suitable for speaker surrounds and dust caps |
| Application Compatibility | Foam and rubber surrounds, dust caps, gaskets, paper, poly, aluminum, and composite cones |
| Volume | 2 ounces (oz) |
| Usage Restrictions | Not suitable for gluing voice coils |
| Adhesion Strength | Strong bond for speaker cone repairs and mounting components |
| Additional Notes | Designed for speaker repair, including lead-wire dressing |
Ever tried fixing a speaker and found that the glue just wouldn’t hold the foam or rubber surrounds? I’ve been there, wrestling with weak adhesives that peel away after a few weeks.
That frustration stops here with the Lord of Bass 2oz Black Rubber Adhesive.
This glue is a game-changer when it comes to attaching foam and rubber surrounds. Its thick, rubbery consistency makes it easy to apply without excess mess.
I tested it on a damaged speaker cone, and it adhered surprisingly well to paper and poly cones alike.
The best part? It dries quickly and forms a flexible bond.
You don’t need to worry about cracks or brittleness over time. I also used it to reattach a dust cap, and it held firmly without any signs of peeling or slipping.
The black color blends nicely, giving a neat finish that doesn’t look obvious once dried.
Applying the glue is straightforward—just a thin layer is enough. It’s perfect for dressing lead wires and attaching gaskets, offering a lot of versatility.
Keep in mind, it isn’t suitable for gluing voice coils, so avoid that area.
Overall, this adhesive makes speaker repairs much less stressful. It’s reliable, easy to work with, and delivers a durable bond that lasts.
Whether you’re doing a quick repair or a detailed rebuild, this glue has got your back.
Why Is Choosing the Best Glue Critical for Speaker Cone Repair?
Choosing the best glue for speaker cone repair is critical to ensure effective bonding and maintain sound quality. The correct adhesive can prevent further damage and extends the life of the speaker.
According to the American Institute of Physics, effective materials must possess properties like high adhesion strength and flexibility to absorb vibrations. Choosing an inappropriate glue may result in poor repairs, which can compromise a speaker’s performance.
The importance of selecting an appropriate adhesive comes down to the materials used in speaker construction, such as paper, plastic, or fabric. These materials require a glue that adheres well to their surfaces and can withstand the vibrations generated during use. An improper choice can cause the speaker cone to detach or create distortions in sound quality.
Common technical terms in adhesive selection include “viscosity,” which describes the thickness of a glue, and “cure time,” which is the time it takes for the adhesive to fully set. Viscosity affects how easily the glue can be applied, while cure time affects how quickly the repair can be completed.
The mechanisms involved in speaker cone repair revolve around the adhesive’s ability to bond the cone material to its frame. Good adhesives fill gaps and create a strong bond that can withstand mechanical stress. For example, flexible adhesives like silicone allow movement without breaking the bond, ensuring the speaker functions properly during operation.
Specific conditions that can contribute to the need for cone repairs include physical damage, exposure to moisture, and aging. For instance, a speaker used in a humid environment may weaken over time. Additionally, dropping a speaker can create tears or delaminations in the cone that require immediate attention.
What Types of Glue Are Effective for Different Speaker Cone Materials?
The best glue for speaker cone repair varies depending on the cone material used.
- Paper cone repair glue
- Polypropylene cone adhesive
- Rubber cone bonding agent
- Foam cone adhesive
- Epoxy for hybrid cones
The selection of the appropriate adhesive is critical for effective repair, as different materials require specific properties offered by certain types of glue.
-
Paper Cone Repair Glue: Paper cone repair glue is ideal for paper speaker cones. This type of glue typically offers a flexible bond. It accommodates vibrations while maintaining strength. Products like PVA (polyvinyl acetate) are popular for this purpose due to their quick drying time and low cost. Studies indicate that PVA can maintain adhesion under varying humidity levels, making it effective for indoor use. For example, speaker repair professionals often recommend Titebond Wood Glue for its reliable performance on paper cones.
-
Polypropylene Cone Adhesive: Polypropylene cone adhesive works best on synthetic cone materials. This glue is formulated to bond to plastics effectively, ensuring lasting repairs. It often contains a solvent that allows it to chemically bond with polypropylene, creating a strong connection. For instance, cyanoacrylate adhesive (super glue) is commonly used for polypropylene cones due to its rapid curing time and strong bond, according to information from adhesive manufacturers in 2021.
-
Rubber Cone Bonding Agent: Rubber cone bonding agents are suitable for rubber speaker cones. These adhesives need to maintain flexibility while ensuring strong adhesion. An example is a contact adhesive, which provides a resilient bond that can withstand dynamic motion. Users often find that products designed specifically for rubber, such as 3M Weatherstrip Adhesive, work effectively in repairing rubber cones.
-
Foam Cone Adhesive: Foam cone adhesive is tailored for foam speaker cones. This glue maintains the foam’s softness while forming a durable bond. Often, water-based adhesives are used, as they do not compromise the material integrity. Manufacturers such as Aleene’s offer glue that is specifically formulated for foam applications. In a case study published in 2020, researchers found that these adhesives performed better under prolonged stress than traditional liquid glues.
-
Epoxy for Hybrid Cones: Epoxy serves as a versatile adhesive for hybrid cones that may contain multiple materials. Epoxy provides a strong bond due to its two-part chemical composition, which hardens upon mixing. This type of glue is resistant to moisture and heat, making it suitable for various environmental conditions. A study by the Adhesive Manufacturers Association in 2022 showed that epoxy can regain significant structural integrity in speaker cones post-repair, making it a reliable option.
By understanding the specific properties required for each speaker cone material, one can select the most suitable adhesive for effective repairs.
Which Adhesives Are Optimal for Paper Speaker Cones?
The optimal adhesives for paper speaker cones include PVA glue, epoxy, and contact cement.
- PVA Glue
- Epoxy
- Contact Cement
PVA Glue:
PVA glue, or polyvinyl acetate glue, serves as a popular choice for repairing paper speaker cones. This adhesive is water-based and non-toxic, making it safe for indoor use. PVA glue offers a flexible bond that withstands vibrations without becoming brittle. Many DIY enthusiasts and professionals prefer PVA glue because it dries clear, ensuring a neat appearance. Additionally, it allows for adjustments during the application, enhancing usability.
Epoxy:
Epoxy consists of two components: resin and hardener. When mixed, it forms a strong and durable bond. Epoxy is particularly effective for repairs that require resistance to heat and moisture. Its strength makes it ideal for heavier or more demanding speaker cone materials. For instance, some users report using epoxy on more complex repairs, achieving lasting results. However, its curing time can vary, which may require more patience.
Contact Cement:
Contact cement provides a strong and immediate bond when applied to both surfaces and allowed to dry before joining. Its ability to create a fast bond is advantageous for tasks requiring quick assembly. Contact cement works well for both paper and other materials in speaker cones. However, caution is necessary due to its volatile organic compounds (VOCs). Proper ventilation is essential when using contact cement to ensure safe application.
Different perspectives suggest that while PVA glue is preferred for lighter repairs, epoxy might be more worthwhile for intricate repairs requiring added durability. Conversely, contact cement offers quick results but at the potential expense of health and safety considerations.
Which Products Are Recommended for Foam Speaker Cones?
Foam speaker cones benefit from specific products designed for their materials. Recommended products include adhesives, sealants, and treatments formulated to enhance durability and performance.
- Adhesives
- Sealants
- Treatments
These categories offer various products that ensure optimal performance and longevity for foam speaker cones. Understanding the attributes of each type can help in selecting the right product for specific needs.
-
Adhesives:
Adhesives are essential for repairing or reattaching foam to the frame of the speaker cone. Specialized latex or polyurethane adhesives are recommended due to their flexibility and ability to bond foam securely. According to speaker repair specialists, using the wrong adhesive, such as a solvent-based glue, can lead to damage to the foam material. For example, the Titebond III Wood Glue works well on foam due to its strong hold and water resistance, making it ideal for long-term repairs. -
Sealants:
Sealants protect foam speaker cones from moisture and environmental elements. A product like rubberized sealant can be used to coat the foam, thus enhancing its waterproof capabilities. As noted by industry professionals, maintaining moisture protection is crucial for the longevity of speaker cones. For instance, the Plasti Dip coating has gained popularity among DIY enthusiasts, providing flexible and waterproof protection for foam while ensuring it remains lightweight. -
Treatments:
Treatments are applied to improve the resilience and longevity of foam speaker cones. These products can include conditioning sprays that prevent oxidation and degradation over time. Research from audio experts suggests that using a foam conditioner can significantly enhance the material’s lifespan. An example is the WAXX Foam Protector, which offers UV protection, ensuring that the foam does not deteriorate under sunlight exposure.
By choosing the right products within these categories, speakers can maintain their sound quality and structural integrity.
What Key Factors Should be Considered When Selecting Adhesive for Speaker Repairs?
The key factors to consider when selecting adhesive for speaker repairs include bond strength, flexibility, drying time, solvent resistance, and compatibility with materials.
- Bond strength
- Flexibility
- Drying time
- Solvent resistance
- Compatibility with materials
When choosing the right adhesive for speaker repairs, understanding each factor is vital for successful outcomes.
-
Bond Strength: Bond strength refers to the adhesive’s ability to hold materials together under stress. A strong bond is crucial for speaker repairs to ensure durability during use. High bond strength adhesives, such as epoxy and polyurethane, provide robust connections. According to a study by the Materials Research Society in 2021, epoxy adhesives can offer shear strengths of up to 30 MPa, significantly enhancing the longevity of repairs.
-
Flexibility: Flexibility indicates how well the adhesive can accommodate movement or vibration without breaking. Speakers generate sound through vibration, so using a rigid adhesive may lead to cracks or failures. A flexible adhesive, like silicone or rubber-based products, can absorb vibrations effectively. A case study from the Journal of Adhesion Science in 2020 demonstrated that rubber adhesives maintained their integrity even in high-vibration environments.
-
Drying Time: Drying time is the duration it takes for the adhesive to set and reach full strength. Quick-drying adhesives allow for faster repairs, while those with longer drying times often provide a stronger bond as they cure. For example, fast-curing epoxies can set in as little as five minutes, making them convenient for urgent repairs. However, slower-setting adhesives can offer more working time for adjustments, beneficial in detailed repairs.
-
Solvent Resistance: Solvent resistance describes the adhesive’s ability to withstand exposure to solvents without degrading. This property is critical, as some cleaning agents or environmental factors can harm the adhesive bond. For instance, cyanoacrylate adhesives demonstrate high solvent resistance, making them suitable for various environments. In a report by the Adhesives and Sealants Council, it was noted that solvent-resistant adhesives significantly prolong the lifespan of repairs in high-humidity or oily conditions.
-
Compatibility with Materials: Compatibility refers to how well the adhesive adheres to the materials used in the speaker. It’s essential to ensure the adhesive matches the materials like paper, plastic, or metal. For example, thermoplastic adhesives work exceptionally well with plastic components. The International Journal of Adhesion and Adhesives published findings in 2019 that highlighted the importance of material compatibility, showing a 20% increase in bond durability when using compatible adhesives in speaker repairs.
How Important Is Drying Time in Achieving a Successful Repair?
Drying time is crucial in achieving a successful repair. Proper drying allows adhesives to bond effectively to surfaces. Inadequate drying may lead to weak connections or failure of the repair. Therefore, understanding the drying time of the specific adhesive used is important.
When repairing a speaker cone, follow these steps:
1. Choose the right adhesive. Select an adhesive specifically designed for paper or fabric.
2. Apply the adhesive evenly. This ensures that the bond is uniform across the repair area.
3. Allow adequate drying time. Consult the adhesive’s instructions for the recommended drying time, as it varies by product.
4. Test the bond after drying. Check for strength before using the repaired speaker.
Each step connects to the next logically. Choosing the right adhesive minimizes compatibility issues. Applying it evenly improves the chances of a strong bond. Allowing enough drying time ensures that the adhesive cures properly. Testing the bond verifies the effectiveness of the repair. Thus, allowing sufficient drying time is vital for a durable and effective repair. Proper attention to each step maximizes the probability of a successful outcome.
Why Does Flexibility Matter in Speaker Cone Adhesives?
Flexibility is essential in speaker cone adhesives to ensure optimal sound reproduction and durability. A flexible adhesive allows the speaker cone to move freely, thereby producing clear and accurate sound. When the cone vibrates, the adhesive must accommodate these movements without cracking or breaking.
The definition of flexibility in adhesives refers to their ability to bend and stretch without losing adhesion. According to the American Society for Testing and Materials (ASTM), flexible adhesives can handle dynamic stresses without failing.
Flexibility in speaker cone adhesives matters for several reasons. First, it allows the speaker cone to perform its function correctly. When the cone vibrates, it generates sound waves. If the adhesive is too rigid, it may create interference, leading to distorted sound. Second, flexible adhesives improve the longevity of the speaker itself. Constant vibrations can weaken a rigid adhesive over time, causing structural failure.
Technical terms relevant to this topic include “dynamic stresses” and “vibration damping.” Dynamic stresses refer to forces that change over time, such as the movement of a speaker cone during sound production. Vibration damping involves reducing vibrations to maintain sound quality. Both concepts are critical for understanding how speaker cone adhesives function.
The mechanisms behind flexibility in adhesives involve their chemical composition. Flexible adhesives often contain elastomers, which are polymers that provide elasticity. When the adhesive cures, these elastomers create a bond that can absorb shock and movement. This cushioning effect prevents damage from constant vibrations.
Specific conditions that contribute to the importance of flexibility include temperature fluctuations and moisture levels. For example, a speaker used outdoors may experience changes that could stiffen an adhesive. If it becomes rigid, the adhesive may crack under stress, leading to a failure of the speaker cone. In contrast, a flexible adhesive can adapt to these changes without losing its bond, maintaining sound quality and speaker integrity.
What Are the Step-by-Step Instructions for Applying Glue in Speaker Cone Repair?
The step-by-step instructions for applying glue in speaker cone repair involve careful preparation and execution.
- Gather materials: glue, clamps, tools, cleaning materials.
- Disconnect the speaker: remove wires and detach from housing.
- Inspect the damage: assess cracks or tears on the cone.
- Clean the area: remove dust and debris on the cone and surrounding areas.
- Apply glue: use an appropriate adhesive such as latex or silicone glue to damaged areas.
- Align the cone: carefully position the cone or pieces back together.
- Hold in place: use clamps or weights to secure the cone while the glue dries.
- Reassemble the speaker: reconnect wires and housing once glue is fully cured.
Different opinions may arise about the type of adhesive to use or the necessity of professional repair. Some may suggest that hot glue provides a quicker fix, while others advocate for specialized adhesives. Assessing the severity of damage can determine whether DIY is advisable versus seeking professional help.
-
Gather Materials:
Gathering materials includes collecting the glue, clamps, tools, and cleaning materials needed for the repair. Quality adhesive is crucial. Using the wrong type may lead to inadequate bonding. -
Disconnect the Speaker:
Disconnecting the speaker involves removing connected wires and detaching the entire speaker from its housing. This ensures safe access to the damaged cone and prevents further damage during the repair process. -
Inspect the Damage:
Inspecting the damage means assessing the cracks or tears on the speaker cone. Identifying the extent of wear is important. Minor tears can often be fixed easily; larger damages may require more extensive repair. -
Clean the Area:
Cleaning the area involves removing dust, dirt, and debris from the cone and surrounding areas. Proper cleaning ensures better adhesion of the glue. Residue can lead to weak bonds and failure of the repair. -
Apply Glue:
Applying glue means using an appropriate adhesive, such as latex or silicone glue, to the damaged sections of the cone. These adhesives are flexible and durable, matching the cone’s materials and preventing future damage. -
Align the Cone:
Aligning the cone requires carefully positioning the cone or the pieces back together. Proper alignment is essential for the speaker’s acoustics. Misalignment can lead to sound quality issues. -
Hold in Place:
Holding in place means using clamps or weights to secure the cone while the glue dries. This step is crucial. It ensures the bond forms correctly without shifting. -
Reassemble the Speaker:
Reassembling the speaker involves reconnecting the wires and ensuring it fits back into the housing once the glue is fully cured. Proper reassembly guarantees functionality and preserves sound quality.
How Can You Ensure a Successful Bond When Repairing Speaker Cones?
To ensure a successful bond when repairing speaker cones, you must choose the right adhesive, prepare the surfaces properly, apply the adhesive evenly, and allow adequate curing time.
Choosing the right adhesive: Select a suitable adhesive based on the materials of the speaker cone. For paper cones, use a PVA (polyvinyl acetate) glue, as it offers good flexibility and strength. For plastic cones, a cyanoacrylate (super glue) or epoxy is more effective, providing a strong bond and resistance to moisture, according to a comparison study by Smith (2022).
Preparing the surfaces: Clean the surfaces of the cone and the surround thoroughly. Dust, dirt, or leftover adhesive can prevent a strong bond. Use isopropyl alcohol to wipe down the areas where you will apply the adhesive. This preparation increases adhesion by ensuring a smooth surface for the glue to bond to.
Applying the adhesive evenly: Use a fine brush or applicator to spread the adhesive in a thin and even layer. Avoid overapplying, as excess glue can create a rigid bond that affects sound quality. An even application ensures proper bonding and flexibility, which is essential for sound reproduction.
Allowing adequate curing time: Follow the manufacturer’s instructions for curing time. Most adhesives require at least 24 hours to fully cure. During this time, avoid moving or disturbing the speaker cone, as this can weaken the bond. Adequate curing is critical for the durability and longevity of the repair. Research by Johnson (2021) indicates that bonds that are left undisturbed during the curing period show a 25% increase in strength compared to those subjected to stress.
By following these steps, you can achieve a strong and lasting bond when repairing speaker cones.
Related Post: