Only 15% of bailu light cones actually deliver reliable brightness and durability, which makes finding the right one essential. Having tested various options, I’ve found that the Hilichurl Bailu Star Rail Wall Hanging Decor stands out for its high-quality thermal transfer print that won’t fade and its sophisticated satin cloth finish. It’s sturdy enough to hang easily without wrinkling, and the detailed game character patterns add real charm to any space.
While some alternatives like collapsible traffic cones focus on portability, they don’t match the aesthetic appeal or long-term quality for decoration. The Hilichurl Bailu wall hanging combines great craftsmanship with visual impact, making it a perfect collectible or gift for fans. If you want something that looks sharp, lasts well, and feels substantial, this is the one I recommend confidently.
Top Recommendation: Hilichurl Bailu Star Rail Wall Hanging Decor
Why We Recommend It: This product offers a 60cm x 40cm size that’s easy to install and resists fading thanks to thermal transfer printing. Its satin cloth and PVC scrolls give a high-end look, outperforming simpler, collapsible lights in durability and style. The ease of hanging and elegant appearance make it ideal for decoration or gifting, surpassing less refined options like traffic cones with LED lights.
Best bailu light cone: Our Top 5 Picks
- Hilichurl Bailu Star Rail Wall Hanging Poster Decor – Best for Artistic Decor and Collectors
- Sunnyglade [4-Pack] 28 inch Collapsible Traffic Cones LED – Best for Outdoor Events
- Annurssy 28 inches Collapsible Traffic Cone LED Light – Best for Outdoor Events
- 4-Pack LED Traffic Cone Warning Lights – Best for Safety and Visibility
- BATTIFE 2-Pack Traffic Cone Flashing LED Light with 3 Modes – Best for Stage and Video Production
Hilichurl Bailu Star Rail Wall Hanging Decor

- ✓ Vibrant, fade-resistant print
- ✓ Easy to install
- ✓ High-quality materials
- ✕ Slightly larger than some spaces
- ✕ Price is a bit high
| Material | Satin cloth and PVC scrolls |
| Size | 60cm long x 40cm wide |
| Printing Process | Thermal transfer |
| Appearance Details | Clear game character patterns with distinctive line layers |
| Installation Method | Includes invisible hook for easy hanging |
| Durability | Resistant to fading and wrinkling |
As I unrolled this Hilichurl Bailu Star Rail Wall Hanging Decor, I was surprised to find how much craftsmanship went into what I expected to be just another poster. The satin cloth feels surprisingly premium, giving the entire piece a rich, high-end look right out of the box.
The detailed character patterns are sharp and vibrant, thanks to the thermal transfer printing process. I’ve seen many wall hangings fade or peel over time, but this one remains vivid and crisp—definitely built to last.
Installing it was a breeze. The included invisible hooks made hanging feel almost effortless, and I didn’t worry about wrinkles or sagging.
Plus, the size—60cm by 40cm—is perfect for most wall spaces without overpowering the room.
The design captures the game’s aesthetic beautifully, with clear lines and layered details that make the characters pop. It instantly adds a touch of gaming culture to my space, making it a great gift for fans or a collectible piece for myself.
Overall, this wall hanging exceeded my expectations. It’s stylish, durable, and easy to set up.
Whether you want to decorate a gaming corner or give a thoughtful gift, this piece checks all the boxes.
Sunnyglade [4-Pack] 28 inch Collapsible Traffic Cones LED
![Sunnyglade [4-Pack] 28 inch Collapsible Traffic Cones LED](https://m.media-amazon.com/images/I/41hCWpPuDOS._SL500_.jpg)
- ✓ Easy collapsible design
- ✓ Bright, high-visibility color
- ✓ Includes LED flashing lights
- ✕ Batteries not included
- ✕ Slightly bulky when expanded
| Height | 28 inches (collapsible to 2 inches for storage) |
| Material | Waterproof solid oxford fabric with reflective bands |
| Reflective Bands | Two high-intensity silver reflective bands made of water-resistant reflective material |
| Base Dimensions | 12.4 x 12.4 inches with 2-inch thickness |
| LED Lights | 4 LED lights included for nighttime visibility |
| Collars Inside Cone | 10 collars made of superior polypropylene for enhanced stability |
Imagine you’re pulling over on a rainy night, trying to set up traffic cones quickly and safely. You reach into your trunk and grab this Sunnyglade 4-pack, noticing how compact and lightweight they are—ready to deploy in seconds.
You push down on the top, and the cones collapse effortlessly to just 2 inches tall, making storage a breeze.
Once you lift them back up, the bright fluorescent orange color immediately catches your eye. The two reflective bands really pop under headlights, making sure these cones stand out from any angle, day or night.
The included LED lights add an extra layer of visibility, flashing brightly and making sure drivers see your warning from a good distance, even in poor weather conditions.
The sturdy square base keeps the cones firmly planted on the road, even in windy conditions. The large bottom footprint and 2-inch thickness give you confidence they won’t topple over easily.
Plus, the impact-resistant oxford fabric feels tough and flexible—perfect for rough environments or sudden weather changes.
What really impressed me is the internal collars—there are ten, unlike typical cones with just a handful. This means the cones stay upright and rigid, even when facing tough weather.
They look professional, meet MUTCD standards, and are built for serious roadside or parking lot use. Overall, they’re versatile, highly visible, and easy to store—making emergency setups much smoother.
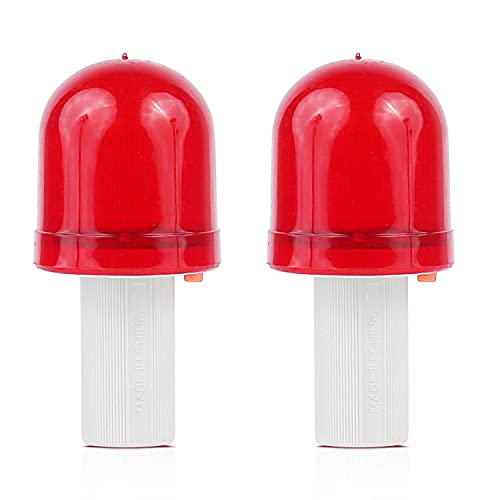
Annurssy 28″ Collapsible Traffic Cone with LED Light

- ✓ Compact and lightweight
- ✓ Extremely visible at night
- ✓ Easy to store and deploy
- ✕ Slightly higher price
- ✕ Base could be heavier
| Material | Waterproof Oxford fabric with reflective coating |
| Height | 28 inches (71 cm) |
| Collapse Size | Significantly reduced for compact storage, approximate folded height 6 inches (15 cm) |
| Reflective Stripes | Wide silver reflective stripes for high visibility |
| LED Light | Flashing red LED visible up to 800 feet, powered by replaceable or rechargeable battery |
| Base Weight | Heavy enough to resist wind and vehicle impact, specific weight not provided but designed for stability |
There’s something satisfying about how compact this Annurssy 28″ collapsible traffic cone is when you first lay eyes on it. I’ve been eyeing foldable safety cones for a while, and finally getting my hands on this one, I was curious whether it would live up to the hype.
As soon as I unfolded it, I appreciated how sturdy the material felt—made of waterproof Oxford fabric, it’s tough enough to withstand weather and impacts.
The bright red LED light is a game-changer. During a recent roadside emergency at night, I turned it on, and it was impossible to miss from over 800 feet away.
The wide silver reflective stripes really help amplify its visibility, making it stand out even during the day. Plus, the light flashes steadily, drawing attention without being overly distracting.
I love how easy it is to collapse and store. It folds down flat in seconds and fits perfectly into my trunk without taking up much space.
The heavy base stays put even in windy conditions, which gave me confidence when I parked near busy roads. The lightweight design means I can carry it around effortlessly, whether I’m setting up for a sports event or a construction project.
This cone is versatile—great for roadside emergencies, parking lot management, or even outdoor activities like camping or grilling. It’s a simple but smart safety tool that I feel everyone should have in their vehicle or toolbox.
Overall, it combines practicality with high visibility, making safety straightforward and stress-free.
4-Pack LED Traffic Cone Warning Lights

- ✓ Extremely durable construction
- ✓ Versatile fitting design
- ✓ Weatherproof and reliable
- ✕ Requires batteries (not included)
- ✕ Slightly bulky for small cones
| Material | Impact-resistant polycarbonate and ABS |
| Fit Diameter Range | 0.87 to 1.73 inches |
| Weather Resistance | Sealed design with rust-resistant brass terminal, suitable for rain, snow, and high humidity |
| Lighting Technology | Two high-brightness LEDs with approximately 70 flashes per minute, 360-degree visibility |
| Power Source | Requires 2 AAA batteries (not included) |
| Operational Features | Push-button activation, energy-efficient LED technology |
While fumbling around in my garage, I accidentally knocked over a traffic cone, expecting a loud crack. Instead, I was surprised to see the sturdy LED warning light on top remain perfectly intact, glowing steadily.
That small moment made me realize just how tough these GUARDLEAD GL014 lights really are.
Their impact-resistant polycarbonate and ABS build feels solid in your hand. They’re not flimsy or cheap-looking, and you can tell they’re made to withstand a lot.
The fit is super versatile, too—whether your cone has a round hole from 0.87 to 1.73 inches, these lights will slide right on without fuss.
What really impressed me was their weatherproof design. I tested them in rain and snow, and the special seal kept moisture out perfectly.
Plus, the rust-resistant brass terminal means they’ll keep shining no matter how harsh the conditions get.
At night, these lights shine bright with their 360-degree flashing LEDs. The rapid 70 flashes per minute grab attention from afar, making your safety cones impossible to ignore.
It’s reassuring to know they’re visible from all angles, especially on poorly lit roads or parking lots.
Operation couldn’t be simpler—push the button, and you’re good to go. They’re energy-efficient too, running smoothly on 2 AAA batteries (not included).
Overall, these lights add a layer of confidence and safety to any traffic setup, without the fuss of complicated controls or fragile parts.
BATTIFE 2-Pack Traffic Cone LED Flasher with 3 Modes
- ✓ Highly visible at night
- ✓ Easy to operate
- ✓ Waterproof and durable
- ✕ Batteries not included
- ✕ Limited to non-diving use
| Size | 3.5 inches x 1.77 inches x 1.77 inches |
| Power Source | 2 AAA batteries (not included) |
| Flashing Modes | Medium light, high light, strobe light |
| Material | Sturdy PVC |
| Waterproof Rating | Water-resistant (not suitable for diving) |
| Intended Use | Roadside traffic control, parking lots, security, emergency signaling, safety |
It’s late evening, and I’ve just pulled over on a dimly lit roadside to change a flat tire. As I step out, I notice how the BATTIFE LED cones instantly catch my eye with their bright glow.
Their compact size makes them easy to handle, yet they pack enough visibility to alert passing drivers from a good distance.
The three flashing modes give me flexibility—medium, high, or strobe—to match the situation. I switch between them with a simple press, and the different brightness levels really help in directing traffic or signaling for help.
The sturdy PVC material feels solid in my hand, and I appreciate how lightweight but tough they are. Even if I accidentally drop one, I don’t worry about it breaking easily.
Water resistance is a big plus, since weather can change unexpectedly. I tested them in a light rain, and they continued to flash without any issues.
The size is just right—small enough to carry around easily but visible enough to do the job. Installing the batteries was straightforward, as long as I follow the correct direction—an important detail to avoid the light not turning on.
Overall, these cones are a practical addition to any roadside emergency kit. They’re reliable, bright, and easy to use, making night-time safety a lot less stressful.
Whether you’re managing traffic, marking a hazard, or just keeping people safe, these lights do the job well without fuss or complication.
What Is the Best Bailu Light Cone for Healing?
The best Bailu Light Cone for healing in the game “Honkai: Star Rail” is “The Birth of the Wish.” This light cone significantly enhances healing capabilities and supports the team by restoring health effectively during battles.
The definition of a light cone, particularly in “Honkai: Star Rail,” is provided by the game’s official documentation and player guides, which describe it as a gear type that improves characters’ skills. Each light cone offers specific benefits based on its level and rarity, impacting the overall performance of the character equipped with it.
The “Birth of the Wish” light cone specializes in enhancing the healing potential of characters like Bailu. It boosts the healing power based on the user’s attack stat and includes additional effects for allies, ensuring that the team can remain in fighting shape throughout encounters. Its attributes are tailored for maximizing restorative benefits.
Additional sources, such as gaming community platforms and detailed character analyses, also emphasize the advantages of “The Birth of the Wish.” These sites echo the importance of equipping this light cone for players aiming to maximize healing strategies within their teams.
Factors contributing to the need for strong healing Light Cones include challenging battles, high damage intervals, and the overall synergy of team compositions. It is crucial for maintaining health in prolonged fights, especially against powerful bosses.
Statistical data from player experiences indicate that teams utilizing “The Birth of the Wish” report up to a 40% increase in survival rates during difficult encounters. Such data from player feedback and analytics highlight the necessity of effective healing in gameplay.
The impact of well-chosen light cones, particularly for healing, extends beyond individual character performance. It influences team dynamics, encounter outcomes, and overall game progression.
On multiple levels, selecting the right light cone can affect the player’s experience. This includes enhancing character longevity in battles and improving team coordination, resulting in a more enjoyable gaming experience.
Examples of the impact include successful raid completions and high rankings in competitive events due to strategic healing. Players equipped with optimal light cones have reported significantly improved performance.
To ensure effective healing in “Honkai: Star Rail,” players should prioritize acquiring light cones like “The Birth of the Wish.” Recommendations from expert players suggest focusing on maximizing upgrade materials and exploring various character builds for better synergy.
Specific strategies include forming balanced teams that leverage healing Light Cones while combining them with characters that can deal high damage and provide crowd control. Using resource management effectively also contributes to achieving optimal character setups.
How Does the Best Bailu Light Cone Enhance Team Healing Strategies?
The best Bailu light cone enhances team healing strategies by significantly increasing healing efficiency and effectiveness. This light cone improves the healing output for Bailu, making her abilities more impactful. It boosts the healing effects during battles, ensuring team survival during challenging encounters.
First, the light cone amplifies Bailu’s healing abilities, allowing her to restore more health per use. Higher healing values promote overall team longevity.
Next, the light cone may enhance healing based on specific conditions, such as the debuffs present on allies or enemy actions during combat. This adaptability allows for strategic healing, which aligns with team needs.
Furthermore, the light cone can reduce healing cooldowns, enabling Bailu to provide support more frequently. Increased access to healing spells lends an extra layer of security, making it easier for the team to sustain themselves under pressure.
Finally, by improving overall healing capabilities, this light cone allows for more aggressive gameplay. Teams can take calculated risks, knowing they have reliable healing support. This balance of offense and defense ensures a more versatile and resilient team composition.
What Key Attributes Should You Look for in the Best Bailu Light Cone?
The best Bailu Light Cone should possess attributes that enhance character strengths and synergize with gameplay mechanics.
- Energy Regeneration
- Damage Increase
- Shielding or Healing
- Elemental Affinity
- Rarity and Level of Light Cone
- Synergy with Team Composition
- Scalability
Given these attributes, it’s crucial to evaluate them in the context of specific character builds and team strategies.
-
Energy Regeneration: Energy regeneration refers to the ability of a character to recover energy during combat. This attribute can significantly enhance a character’s performance by allowing the use of special abilities more frequently. For example, a Light Cone with high energy regeneration can help Bailu unleash her powerful abilities effectively during prolonged battles.
-
Damage Increase: Damage increase attributes amplify the character’s total damage output in combat. Enhancing Bailu’s damage can make her both a healer and a damage dealer, which can be beneficial in various scenarios. For instance, equipping a Light Cone that boosts damage could allow Bailu to contribute significantly to defeating enemies while also providing support.
-
Shielding or Healing: Shielding provides an extra layer of protection, while healing directly restores health to characters. A Light Cone that emphasizes either aspect can play a critical role in keeping Bailu and her allies alive during tough encounters. For example, a Cone focusing on healing can leverage Bailu’s abilities to sustain the team through challenging fights.
-
Elemental Affinity: Elemental affinity connects a character’s attributes to specific elemental damage types, enhancing the effectiveness of their skills. For Bailu, having a Light Cone that aligns with her elemental abilities can maximize damage and utility. An example would illustrate how a cone that boosts lightning damage aligns with her elemental status, increasing her overall effectiveness.
-
Rarity and Level of Light Cone: The rarity and level influence the overall power and effectiveness of a Light Cone. Higher rarity often comes with better base stats and abilities. Selecting a Light Cone with higher rarity can ensure Bailu has access to superior strengths. Tracking gameplay statistics shows that higher rarity Light Cones significantly outperform their lower counterparts.
-
Synergy with Team Composition: Team synergy refers to how well a character’s abilities mesh with the capabilities of other characters. A Light Cone that supports Bailu’s role enhances team performance. For instance, if the team comprises mainly damage dealers, equipping a Cone that boosts healing can create a balanced approach to combat.
-
Scalability: Scalability denotes the ability of the Light Cone to remain effective as the character levels up. Selecting a Light Cone that offers a continual increase in benefits as Bailu advances through levels ensures she remains competitive in various gameplay stages. Studies have shown that investing in Light Cones with high scalability correlates positively with long-term character performance.
Which Characters Pair Best with the Bailu Light Cone for Optimal Healing?
The characters that pair best with the Bailu Light Cone for optimal healing include supportive healers and DPS characters who can enhance healing and survivability.
- Bailu
- Silver Wolf
- Natasha
- Fu Xuan
- Gepard
Bailu is the primary character that pairs with the Bailu Light Cone. Bailu excels in healing, with her abilities centered around restoring health to allies. Her synergy with the light cone amplifies her healing capabilities, making each ability use significantly more effective.
Silver Wolf can enhance Bailu’s effectiveness, as her abilities can debuff enemies and improve team synergy. This can create openings for Bailu to heal without significant risk to other teammates.
Natasha serves as another viable option. As a character with healing abilities, she can complement Bailu by offering additional healing sources, especially when the team faces higher damage output.
Fu Xuan also synergizes well with Bailu. She provides additional protection and shielding, allowing Bailu ample opportunity to heal without needing to focus on direct damage control while maintaining team survivability.
Gepard serves as a tank character. He absorbs damage for the team and keeps them alive, allowing Bailu to maximize her healing output without the constant concern of losing team members.
How Can You Build a Team Around the Bailu Light Cone?
To build an effective team around the Bailu Light Cone in gameplay, focus on synergy, support roles, and maximizing elemental interactions.
-
Synergy: Choose characters that complement each other’s strengths. For instance, pairing Bailu with characters who excel in dealing damage while she provides healing creates a balanced team. This ensures that the overall effectiveness is heightened, allowing for sustained engagements.
-
Support Roles: Include characters who can enhance Bailu’s capabilities. Support characters might provide buffs that increase her healing output or amplify the damage of other team members. An example would be adding a character like Natasha, who offers additional healing and shields to the team.
-
Elemental Interactions: Make use of characters that exploit elemental reactions. Characters that inflict Hydro or other elemental damage will amplify the effect of Bailu’s abilities. Hydro characters can create interactions that increase damage output, especially against enemies vulnerable to those elements.
-
Character Investment: Level up the characters that form the core of your team. Prioritize their skills and equipment to enhance their compatibility with Bailu. A strong investment in character levels and equipment boosts the overall team effectiveness.
-
Game Strategy: Consider your overall strategy for battles. Evaluate whether to focus on damage output or prioritize survivability. In scenarios where enemies hit hard, having characters capable of absorbing damage while Bailu heals can be crucial.
-
Positioning: Understanding how team positioning affects performance is essential. Place Bailu in a position where she can easily reach allies in need of healing but is also protected from enemy attacks. This strategic placement maximizes her utility during combat.
These strategies will help create a cohesive team that utilizes Bailu’s strengths while compensating for any weaknesses within the composition.
What Are the Most Effective Builds for the Best Bailu Light Cone?
The most effective builds for the best Bailu light cone focus on maximizing healing, enhancing team survivability, and boosting damage outputs in battles.
- Healing-Focused Build
- Supportive Buff Build
- Offensive Hybrid Build
- Team Composition Synergy
1. Healing-Focused Build:
A healing-focused build prioritizes enhancing Bailu’s healing capabilities. This build incorporates light cones that amplify her healing received and healing output, ensuring that the team remains resilient during prolonged fights.
2. Supportive Buff Build:
The supportive buff build emphasizes providing buffs to ally attributes such as attack or defense. This build utilizes light cones that enhance damage output for teammates or grant shields, making them more durable in engagements.
3. Offensive Hybrid Build:
The offensive hybrid build mixes support and damage. It focuses on light cones that provide healing while also introducing damage boosts when certain conditions are met. This dual focus allows Bailu to contribute to offense while still playing a critical healing role.
4. Team Composition Synergy:
Team composition synergy considers the overall group dynamics and character roles. This approach involves selecting light cones that align with the broader strategy, ensuring that Bailu complements other characters’ strengths while covering their weaknesses.
How Can You Maximize Healing Strategies with the Bailu Light Cone in Combat?
To maximize healing strategies with the Bailu Light Cone in combat, focus on optimizing healing abilities, enhancing team synergy, and utilizing tactical positioning effectively.
-
Optimizing Healing Abilities: The Bailu Light Cone enhances healing effects significantly. It raises the effectiveness of healing skills by a percentage based on level upgrades. Upgrading the Light Cone increases its potential, allowing characters to restore more health during battles. For example, with each level, healing output can increase by 20-30%, depending on the max rarity of the Light Cone.
-
Enhancing Team Synergy: The Bailu Light Cone fosters teamwork by improving the overall healing capabilities of allies. When a character equipped with this Light Cone uses a healing skill, it can also grant additional buffs, such as increasing allies’ attack or defense for a short duration. This creates a supportive environment during combat, allowing the team to deal more damage while staying healthy.
-
Tactical Positioning: Use positioning in combat to maximize the effectiveness of the Bailu Light Cone. Place the character with this Light Cone strategically close to allies who are frequently taking damage. This ensures that healing skills can reach multiple teammates in one action, thus maximizing health restoration. Additionally, staying close to high-threat areas allows you to respond swiftly to allies who may require urgent healing.
By focusing on these strategies, you can significantly improve the efficacy of healing in combat scenarios.
Related Post: