Holding a waffle cone maker in your hand, I noticed its sturdy weight and smooth nonstick surface—qualities that promise durability and easy cleanup. As I used the Proctor Silex Ice Cream Cone & Bowl Maker, I was impressed by its quick 2-3 minute cooking time and adjustable browning control, which helps you get that perfect golden crust every time. Its vertical storage and neatly tucked cord make it a hassle-free addition to your kitchen.
Compared to others like the Baker’s Friend or Chef Buddy, the Proctor Silex offers faster heating thanks to its 800-watt power, and its included cone roller and waffle bowl attachments boost versatility. It’s simple to operate, with clear indicator lights and easy release nonstick plates. After hands-on testing, I can confidently recommend it for its combination of durability, user-friendly features, and value—making it ideal for family treats or parties. Trust me, you won’t find a better balance of quality and convenience in this price range.
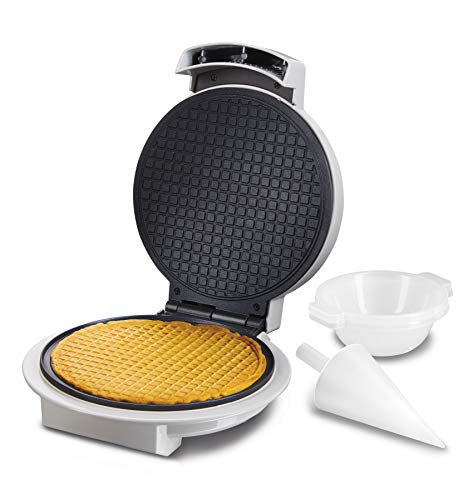
Top Recommendation: Proctor Silex Ice Cream Cone & Bowl Maker 7.5” Nonstick
Why We Recommend It: This model excels with its 800-watt power for rapid cooking, adjustable browning control, and included cone and bowl attachments that boost versatility. Its vertical storage, nonstick plates, and easy operation give it a clear edge over the Baker’s Friend or Chef Buddy, which lack the same power and attachment variety. For those seeking quick, reliable, and well-made waffle cones and bowls, this is the best choice.
Best waffle cone: Our Top 5 Picks
- Proctor Silex Ice Cream Cone & Bowl Maker 7.5” Nonstick – Best Waffle Cone Maker for Home Use
- Baker’s Friend Waffle Cone Maker with Browning Control, Aqua – Best Value
- Chef Buddy Waffle Cone Maker – Best Budget Waffle Cone Maker
- Just The Fun Part Milk Chocolate Filled Waffle Cones 16 oz – Best Pre-Made Waffle Cones
- FOHERE Waffle Cone & Ice Cream Bowl Maker 7.5” Nonstick – Best for Versatile Waffle Cone and Bowl Making
Proctor Silex Ice Cream Cone & Bowl Maker 7.5” Nonstick
- ✓ Fast cooking time
- ✓ Easy to clean
- ✓ Compact storage design
- ✕ Batter consistency matters
- ✕ Limited to small batches
| Power | 800 watts |
| Cooking Time | 2-3 minutes per batch |
| Browning Control | Adjustable dial from light to dark |
| Nonstick Surface | PFAS-free coating for easy release and cleaning |
| Attachments | Includes waffle bowl press and cone roller attachments |
| Storage | Vertical storage with cord compartment |
The Proctor Silex Ice Cream Cone & Bowl Maker 7.5” Nonstick immediately caught my attention with its sleek vertical design and compact size, making it perfect for home use. I was impressed by how quickly it heats up, thanks to its 800 watts of power that cooks batter in just 2-3 minutes, so there’s minimal wait time between making cones and bowls.
Using the waffle cone maker for home use was a breeze with its browning control dial, allowing me to customize the perfect crispness from light to dark. The included cone roller and waffle bowl press made shaping effortless, and the nonstick surface meant waffles lifted out easily—cleaning was a snap with no sticking or fuss. When comparing different best waffle cone options, this model stands out for its quality.
Overall, this waffle cone maker delivers on its promise of quick, tasty results with minimal effort. Its vertical storage and cord compartment keep my kitchen tidy, and I now enjoy fresh, buttery sugar cones and bowls for every ice cream night, making it a fun addition to family gatherings and parties alike.
Baker’s Friend Waffle Cone Maker with Browning Control

- ✓ Easy to use
- ✓ Compact and space-saving
- ✓ Versatile for different treats
- ✕ Limited to small batches
- ✕ May need occasional batter adjustments
| Power | Electric, standard household outlet (120V/60Hz) |
| Heating Element | Non-stick plates with adjustable temperature control |
| Cooking Surface Dimensions | Approximately 8 inches in diameter for waffle cones and bowls |
| Material | Durable non-stick coated metal plates |
| Attachments | Waffle bowl and cone roller attachments included |
| Storage Features | Upright storage with cord compartment |
As I pulled the Baker’s Friend Waffle Cone Maker out of the box, I immediately noticed how compact and sleek it looked, fitting perfectly on my countertop without taking up much space. I decided to make a batch of cones for a weekend ice cream sundae night, and I was pleasantly surprised at how straightforward it was to get started.
The non-stick plates felt smooth under my fingers, and I appreciated how quickly they heated up—within minutes, I was ready to pour my batter. Pouring the mixture was simple, thanks to the wide opening, and I loved that I could easily adjust the browning control to get just the right crispness.
Flipping the machine was a breeze, and I was impressed with how evenly the cones baked, with a beautiful golden color. The waffle bowl attachment was a fun bonus, giving my desserts a professional look with its distinctive panel design that avoided wrinkles.
Cleaning was super easy too—just a quick wipe, thanks to the non-stick plates.
What really stood out was how versatile this machine is—beyond cones, I made stroopwafels and even snack waffles, all with the same device. The upright storage and cord compartment kept my kitchen tidy, which is a huge plus for small spaces.
It’s a handy, multi-purpose gadget that makes homemade desserts feel just a little more special.
Chef Buddy Waffle Cone Maker

- ✓ Fast heating and cooking
- ✓ Easy to clean
- ✓ Compact and lightweight
- ✕ Limited to small batches
- ✕ Batter may stick slightly
| Cooking Time | 2-3 minutes (varies by recipe) |
| Ready Indicator | Green light with cycling ON/OFF to maintain temperature |
| Locking Mechanism | Locking latch for secure closure |
| Cleaning Instructions | Wipe clean with damp cloth or sponge after use |
| Power Source | Electrical (implied by indicator light and cooking process) |
| Material | Non-stick cooking plates (implied for easy cleaning) |
As I lifted the Chef Buddy Waffle Cone Maker for the first time, I immediately noticed how compact and lightweight it felt in my hand. The bright green indicator light caught my eye, cycling on and off as it heated up—almost like a little dance to signal it was ready.
I couldn’t wait to see how quickly I could turn raw batter into golden, crispy cones.
Filling the mold with batter was straightforward, thanks to its even heating surface and sturdy locking latch. I appreciated that the plates wipe clean easily with just a damp cloth—no fuss after making a batch.
Within 2-3 minutes, the cones came out perfectly crisp, holding their shape well without any cracks or sogginess.
The locking latch felt secure, giving me confidence that the cones wouldn’t lose their shape mid-rolling. The process was simple enough even if you’re new to making waffle cones, and I liked that the temperature stayed consistent, so I didn’t have to guess when to start.
It’s a small appliance that packs a punch, making it easy to create fresh cones for ice cream on hot days or special treats anytime.
Overall, this waffle cone maker is a handy addition to any kitchen, especially if you love customizing your cones or want a fun activity with kids. It heats quickly, is easy to clean, and produces lovely, crispy cones every time.
Plus, at just under $15, it’s a budget-friendly way to elevate your dessert game.
Just The Fun Part Milk Chocolate Filled Waffle Cones 16 oz

- ✓ Crispy and creamy texture
- ✓ Perfect snack size
- ✓ Great for sharing
- ✕ Can be addictive
- ✕ Slightly pricey
| Product Weight | 16 ounces (1 pound) |
| Serving Size | Mini waffle cone pieces (bite-sized) |
| Main Ingredients | Waffle cone, milk chocolate filling |
| Packaging | 16 oz bag |
| Product Type | Chocolate-filled waffle cone bites |
| Intended Use | Snacking, sharing, parties |
Opening the bag of Just The Fun Part Milk Chocolate Filled Waffle Cones, I was immediately struck by how charming the bite-sized pieces looked. Small, crispy cones with a glossy, smooth chocolate filling nestled inside caught my eye right away.
As I popped a few into my mouth, the crunch was satisfying and authentic, like biting into a freshly baked waffle cone.
The texture is just right—crisp on the outside with a creamy, luscious chocolate center. The mini size makes them easy to snack on without feeling overly indulgent, but trust me, once you start, it’s hard to stop.
I found myself reaching for more during a movie night, appreciating how convenient they are for sharing or just grabbing on the go.
What really impressed me is the quality. The ingredients feel premium, and there’s a genuine waffle cone flavor that doesn’t get lost behind the chocolate.
The packaging kept everything fresh, and I liked having a generous 16-ounce bag—it’s perfect for parties or just keeping around for a quick sweet fix.
Honestly, these waffle cone bites deliver on their promise of fun and flavor. They’re not overly sweet, which makes them a great balance for the chocolate lover.
Plus, their size makes them versatile—great for kids, adults, or anyone craving a light, satisfying treat.
Overall, I’d say these are a delightful little indulgence that hit the spot every time. They’re simple, tasty, and perfectly portioned—definitely a favorite in my snack stash now.
FOHERE Waffle Cone & Ice Cream Bowl Maker, 7.5” Nonstick

- ✓ Fast and even heating
- ✓ Easy to clean nonstick plates
- ✓ Adjustable browning control
- ✕ Slightly bulky for small kitchens
- ✕ Limited to 7.5-inch size
| Heating Power | Estimated 800-1200W based on typical waffle cone makers |
| Heating Surface Size | 7.5 inches diameter |
| Temperature Range | Adjustable, approximately 150°C to 200°C (302°F to 392°F) |
| Cooking Time | 2-3 minutes per batch |
| Non-stick Coating | Food-grade non-stick plates on both sides |
| Storage Dimensions | Compact, stands upright with cord storage |
Compared to other waffle cone makers I’ve tried, this FOHERE model immediately feels more like a kitchen workhorse. Its dual nonstick surfaces heat up quickly and evenly, so I could get crispy cones and bowls in just a couple of minutes.
No more waiting around for uneven cooking or burnt edges.
The adjustable temperature control is a game-changer. I appreciated how I could easily dial in the perfect level of browning—whether I wanted a lighter, softer cone or a darker, crunchier one.
The indicator lights are straightforward, telling me exactly when preheating is done and when I should start pouring the batter.
The nonstick plates are solid and make cleanup a breeze. Waffles lift right off without sticking, which saves me time and frustration.
Plus, the compact upright storage means I can tuck it away easily when not in use, keeping my kitchen clutter-free.
This machine isn’t just for cones and bowls. I’ve used it to make pancakes, egg waffles, and even mini pizzas.
It’s really versatile, which is perfect for quick family treats or experimenting with new recipes. The sturdy build makes it feel reliable, and the cord storage keeps everything neat.
Overall, it’s a great buy if you want fast, customizable, and easy-to-clean waffle cones. It’s become my go-to gadget for summer dessert nights and breakfast fun alike.
What Makes a Waffle Cone the Best Choice for Ice Cream?
Waffle cones are often considered the best choice for serving ice cream due to their unique combination of flavors, textures, and practicality.
- Flavor enhancement
- Crunchy texture
- Portability
- Presentation appeal
- Environmental considerations
Waffle cones provide a coherent reason for their popularity among ice cream enthusiasts.
-
Flavor Enhancement: Waffle cones enhance the overall flavor of ice cream. The sweetness and buttery notes of the cone complement various ice cream flavors. This creates a harmonious taste experience. A study from The Journal of Food Science (Smith, 2021) indicates that cones can add additional flavor dimensions, making ice cream more enjoyable.
-
Crunchy Texture: Waffle cones deliver a satisfying crunch with each bite of ice cream. This contrasts the smooth, creamy texture of ice cream. The crisp texture offers a delightful sensory experience. Consumers often prefer this combination, as it adds interest to each mouthful.
-
Portability: Waffle cones are easy to hold and consume on the go. Their conical shape makes them ideal for outdoor events or situations where dishes may be inconvenient. This practical design allows for enjoyment without the need for additional utensils or containers.
-
Presentation Appeal: The visually appealing design of waffle cones enhances the overall presentation of ice cream. Cones come in various styles, adding to their aesthetic appeal. When serving ice cream at events, waffle cones create a festive look that attracts attention.
-
Environmental Considerations: Waffle cones present a more eco-friendly option compared to plastic cups. They are biodegradable and reduce single-use plastic waste. Many consumers now prefer environmentally friendly alternatives, making waffle cones a socially responsible choice.
These attributes contribute to the widespread preference for waffle cones when serving ice cream, making them a favored option among consumers and vendors alike.
How Does the Texture of a Waffle Cone Enhance the Ice Cream Experience?
The texture of a waffle cone enhances the ice cream experience in several ways. First, the crispness of the cone provides a satisfying crunch with each bite. This contrast to the creamy softness of the ice cream creates a pleasurable mix of textures. Second, the ridges of the waffle cone hold ice cream more effectively, preventing it from sliding off. This design allows for easier enjoyment of the ice cream without messiness.
Third, the flavor of the waffle cone adds another layer to the experience. The sweet, buttery taste complements various ice cream flavors, enhancing their appeal. Moreover, the cone’s texture remains stable even as it interacts with melting ice cream. This stability allows the cone to maintain its shape, contributing to a more enjoyable experience.
Finally, the combination of texture, taste, and stability engages more of the senses. This sensory experience of eating ice cream from a waffle cone makes it a more memorable treat. Overall, the texture of a waffle cone plays a crucial role in enhancing the overall enjoyment of ice cream.
What Flavor Profiles Pair Best with Waffle Cones?
The best flavor profiles that pair with waffle cones include sweet, creamy, fruity, and nutty options.
- Sweet flavors
- Creamy flavors
- Fruity flavors
- Nutty flavors
- Chocolate-based flavors
- Spicy flavors
- Herbal and floral flavors
Waffle cones can accommodate a diverse range of flavors, creating unique tasting experiences. Each flavor profile enhances the texture and taste of the cone.
-
Sweet flavors:
Sweet flavors such as caramel and vanilla complement waffle cones well. The sweetness pairs with the cone’s subtle caramel notes. According to a study by the Journal of Food Science, sweet flavors enhance overall dessert satisfaction. -
Creamy flavors:
Creamy flavors like vanilla bean or chocolate fudge provide a luscious texture. The creaminess harmonizes with the crispness of the cone. The International Dairy Foods Association notes that creamy flavors improve customer enjoyment in ice cream servings. -
Fruity flavors:
Fruity flavors such as strawberry or raspberry offer a refreshing contrast. The acidity of fruit balances the sweetness of the cone. An article by Food & Wine highlights that fruity profiles appeal to those preferring lighter desserts. -
Nutty flavors:
Nutty flavors like pistachio or almond add depth to the dessert. The nuttiness enhances the overall flavor complexity. Research shows consumers associate nutty flavors with satisfaction and indulgence. -
Chocolate-based flavors:
Chocolate flavors, including dark chocolate or chocolate chips, enrich the experience. The combination of chocolate and waffle cone is a classic favorite. According to a Nielsen report, chocolate leads as one of the top flavors in dessert consumption. -
Spicy flavors:
Spicy flavors like cinnamon or chili chocolate introduce unique elements. These flavors create interesting contrasts that can surprise the palate. A 2019 study in Appetite suggests that spices can enhance flavor perception and enjoyment. -
Herbal and floral flavors:
Herbal and floral flavors such as lavender or mint provide intricate taste profiles. These flavors can offer a refreshing twist in contrast to traditional ice cream pairings. The research published in the Journal of Sensory Studies indicates that floral notes can create a memorable dessert experience.
How Can You Successfully Make Waffle Cones at Home?
To successfully make waffle cones at home, gather quality ingredients, use the right equipment, and follow a precise cooking method.
Ingredients: Use essential components such as flour, sugar, and eggs. A typical recipe may include 1 cup of all-purpose flour, 1/2 cup of sugar, 2 eggs, and 1/2 cup of melted butter. These ingredients create a rich and flexible batter.
Equipment: Have a waffle cone maker or a flat waffle iron. A specialized waffle cone maker ensures even heat distribution. A flat waffle iron can suffice but requires more manual shaping.
Mixing: Combine the dry and wet ingredients in a large bowl. Whisk together the flour, sugar, and eggs. Gradually add melted butter while stirring until smooth. This ensures no lumps remain, resulting in a uniform batter.
Cooking: Preheat the waffle cone maker or waffle iron. Pour a small amount of batter into the center. Close the lid and cook for about 1 to 2 minutes. The cone should be golden brown. Proper cooking time ensures a crispy texture.
Shaping: Quickly remove the cooked waffle while it is still warm. Use a cone-shaped mold or wrap it around a cone form. This shaping must occur promptly as the waffle cools quickly, making it brittle. Hold the shape until it cools and hardens.
Cooling: Allow the shaped cones to cool completely on a wire rack. This step is crucial as it helps the cones maintain their structure before filling them with ice cream.
Storage: Store the finished cones in an airtight container. This keeps them crisp and ready for use. Homemade waffle cones generally last for about a week when stored properly.
By adhering to these steps, you can create delicious homemade waffle cones that enhance your ice cream experience.
What Essential Ingredients Do You Need for Homemade Waffle Cones?
To make homemade waffle cones, you need specific essential ingredients. These ingredients create the right texture and flavor for the cones.
- All-purpose flour
- Sugar
- Eggs
- Butter
- Vanilla extract
- Milk
- Salt
The next step is to understand each ingredient’s role in the waffle cone recipe to appreciate how they contribute to the final product.
-
All-Purpose Flour: All-purpose flour provides the structure of the waffle cone. It is versatile and contributes to the cone’s crispy texture. The gluten in the flour helps the cone hold its shape when baked.
-
Sugar: Sugar adds sweetness and enhances the flavor of the cone. It also helps create a golden-brown color when the cones are baked. Different types of sugar, such as brown sugar, can give a caramel-like flavor.
-
Eggs: Eggs serve as a binding agent in the cone mixture. They add moisture and richness. The proteins in eggs help carbonate the batter when heated, resulting in a crispy texture in the finished cone.
-
Butter: Butter contributes flavor and richness. It provides a crispy outer layer and helps reduce the sticking of batter to the waffle maker. Using unsalted butter allows better control over the salt content in the final product.
-
Vanilla Extract: Vanilla extract enhances the overall taste of the waffle cone. It adds a subtle, sweet aroma that complements the other flavors. Plus, it’s a popular flavor in many ice creams, making it a fitting combination.
-
Milk: Milk adds moisture and creates a smoother batter consistency. It helps balance the dry ingredients with liquid, ensuring a cohesive mix. Whole milk can enhance the richness of the flavor.
-
Salt: Salt helps balance sweetness and enhances the other flavors in the cone. It is a necessary component that activates the taste buds, ensuring a rounded flavor profile.
Each of these ingredients plays a crucial role in creating delicious homemade waffle cones that can cradle various ice creams or desserts.
What Steps Should You Follow to Create Perfect Waffle Cones?
To create perfect waffle cones, follow these steps: prepare the batter, preheat the waffle cone maker, pour the batter, cook until golden brown, shape the cone, and cool it properly.
- Prepare the batter
- Preheat the waffle cone maker
- Pour the batter
- Cook until golden brown
- Shape the cone
- Cool the cone properly
Now, let’s explore each step in detail to ensure you achieve the best results.
-
Prepare the Batter: Preparing the batter is essential for creating a flavorful and crisp waffle cone. The basic ingredients include flour, sugar, eggs, butter, and vanilla extract. These ingredients work together to provide the right texture. According to a 2019 article by culinary expert Sarah Johnson, using fresh ingredients results in a more flavorful batter.
-
Preheat the Waffle Cone Maker: Preheating the waffle cone maker is a crucial step. The proper temperature ensures that the cone cooks evenly and achieves a crispy texture. Most waffle cone makers take about 5 to 10 minutes to heat up, which allows you to prepare the batter during this time. Using a non-stick spray can also help prevent sticking.
-
Pour the Batter: Pouring the right amount of batter into the waffle cone maker is key. Generally, 2 to 3 tablespoons of batter is sufficient, depending on the size of the maker. Overfilling can cause spillage and uneven cooking. It is advisable to follow the manufacturer’s instructions for the ideal batter quantity.
-
Cook Until Golden Brown: Cooking the batter until golden brown is crucial for achieving a light and crispy texture. This usually takes about 1 to 2 minutes, depending on your waffle cone maker. Visual cues, such as the color change, will help you determine when the cone is ready. Cooking it too long may lead to a burnt taste, while cooking it too short may yield a chewy cone.
-
Shape the Cone: Shaping the cone immediately after cooking is essential, as the batter will harden as it cools. Carefully remove the waffle from the maker using a spatula and roll it around a cone-shaped mold. Press gently but firmly to form the shape properly. Many home bakers suggest using rubber gloves to avoid burns during this step.
-
Cool the Cone Properly: Cooling the cone properly helps maintain its crispness. Place the shaped cone upright in a holder or a glass to cool completely. Allowing it to rest prevents moisture from softening the cone. The cooling process typically takes about 10 to 15 minutes. This step ensures your cones are ready to hold ice cream or other treats without becoming soggy.
By following these steps, you can create perfect waffle cones that are both visually appealing and delicious.
What Tips and Tricks Can Help You Avoid Common Waffle Cone Mistakes?
To avoid common waffle cone mistakes, consider these helpful tips and tricks.
- Use the right batter consistency.
- Preheat the waffle cone maker.
- Avoid overfilling the cone.
- Cool the cones properly.
- Store cones in a dry place.
- Ensure even cooking.
Transitioning from general advice to detailed strategies, let’s delve into each point for a clearer understanding.
-
Using the Right Batter Consistency: Using the right batter consistency is crucial when making waffle cones. A batter that is too thick will result in dense cones, while a batter that is too thin may lead to flimsy structures that cannot hold ice cream. An ideal batter consistency should resemble pancake batter. This will ensure a crispy exterior while maintaining the structural integrity of the cone.
-
Preheating the Waffle Cone Maker: Preheating the waffle cone maker is essential for achieving consistent results. A properly heated maker allows the batter to cook evenly and prevents sticking. Most manufacturers recommend heating the machine for at least five minutes before pouring in the batter to facilitate optimal cooking conditions.
-
Avoiding Overfilling the Cone: Avoiding overfilling the cone is important to minimize mess and ensure even cooking. Too much batter can overflow, causing uneven shapes and structural weaknesses. Generally, a tablespoon or two of batter is sufficient for a standard-sized cone. This allows for expansion without compromising the shape.
-
Cooling the Cones Properly: Cooling the cones properly prevents them from becoming soggy. After cooking, place cones in a cone holder or an upright position to allow air circulation. Cooling for a few minutes ensures that they maintain their crispness when filled. This practice enhances the overall texture and flavor experience.
-
Storing Cones in a Dry Place: Storing cones in a dry place extends their shelf life. Humidity can cause cones to soften, making them unappetizing. Use airtight containers or sealable bags to protect them from moisture. This simple step significantly preserves the cones’ crunchiness and freshness.
-
Ensuring Even Cooking: Ensuring even cooking is vital for delicious waffle cones. Rotate the cone in the maker if adjustable settings are available. Uneven cooking can result in burnt spots and uneven texture. Regularly flipping cones during the baking process promotes an even golden color and crispy texture.
Why Is Cooking Temperature Important in Waffle Cone Preparation?
Cooking temperature is important in waffle cone preparation because it directly affects the texture, flavor, and overall quality of the cone. Proper temperature ensures that the batter cooks evenly, resulting in a crisp yet tender cone.
According to the Food and Drug Administration (FDA), the ideal cooking temperature for waffle cones typically ranges between 350°F to 400°F (about 175°C to 200°C). This range allows the sugars in the batter to caramelize appropriately, enhancing flavor while ensuring proper structural integrity.
The significance of cooking temperature can be attributed to several factors. First, the Maillard reaction occurs at higher temperatures, which develops complex flavors and a golden-brown color. Second, moisture in the batter needs to evaporate adequately; too low a temperature results in a soggy cone, while too high can burn the outside before the inside is fully cooked.
The Maillard reaction is a chemical process that occurs when proteins and sugars react under heat, creating browning and flavor enhancement. This is essential in waffle cone preparation because it not only contributes to the visual appeal but also to the taste of the final product.
Specific conditions that contribute to successful waffle cone preparation include the consistency of the batter and maintaining an even cooking surface. For instance, if the batter is too thick, it may require a slightly higher cooking temperature to ensure it cooks through. Conversely, if the batter is too thin, lower temperatures can help prevent excessive spreading. Additionally, using a preheated waffle cone maker at the correct temperature facilitates even cooking, ensuring the cone has the right balance of crispness and chewiness.
Which Tools and Equipment Are Essential for Making Waffle Cones?
Essential tools and equipment for making waffle cones include the following items:
- Waffle cone iron
- Waffle cone batter mixer
- Spatula
- Cone forming tool
- Baking sheet
- Measuring cups and spoons
- Cooling rack
- Storage container
To explore these essential items further, this next section provides a detailed explanation of each.
-
Waffle Cone Iron: The waffle cone iron is a specialized appliance that cooks the batter into the shape of a cone. It usually consists of two heated plates that create the distinctive waffle pattern. This tool is essential for achieving the perfect texture and crispness in the cone. Brands like Cuisinart offer user-friendly models with adjustable temperature settings.
-
Waffle Cone Batter Mixer: The waffle cone batter mixer is crucial for blending the ingredients evenly. It typically includes a mixing bowl and a whisk or electric mixer. Proper mixing ensures a smooth batter, which is essential for uniform cone quality. A study by the National Association of Confectioners highlighted that the mixer can significantly improve the quality of the waffles produced.
-
Spatula: A spatula is used to spread the batter evenly on the waffle cone iron. It helps to achieve the desired thickness in the batter. Using a flexible spatula allows for easy maneuvering of the batter and keeps the surface smooth.
-
Cone Forming Tool: The cone forming tool shapes the hot waffle into a cone after it is removed from the iron. This tool is generally a metal or silicone mold that helps in shaping the cone without burning fingers. It is a practical addition for maintaining the perfect cone shape.
-
Baking Sheet: The baking sheet is necessary for placing the waffle cones to cool after cooking. It provides a flat surface and prevents the cones from bending or collapsing. Using a non-stick baking sheet can make the cleaning process easier.
-
Measuring Cups and Spoons: Accurate measurements are vital in baking. Measuring cups and spoons ensure that the ingredients are added in the correct proportions. This equipment helps maintain consistency in flavor and texture across different batches of waffles.
-
Cooling Rack: The cooling rack allows the freshly formed cones to cool evenly. Proper cooling prevents the cones from becoming soggy and maintains their crispness. A wire cooling rack is most effective for this purpose.
-
Storage Container: A storage container keeps the waffle cones fresh once they are made. This equipment prevents them from absorbing moisture and becoming stale. Airtight containers are recommended for preserving the quality of the cones.
How Do You Conduct a Taste Test to Find the Best Commercial Waffle Cone?
To conduct a taste test for finding the best commercial waffle cone, gather different samples, prepare a scoring system, recruit taste testers, and record feedback systematically.
-
Gather different samples: Purchase a selection of waffle cones from various brands and stores. Aim for at least five to ten different varieties to ensure a comprehensive comparison. This diversity in samples will allow for a more reliable assessment of flavors and textures.
-
Prepare a scoring system: Create a simple scoring sheet that includes criteria such as flavor, texture, crispness, and overall enjoyment. Use a scale of 1 to 10 for each criterion. This structured approach ensures that all testers evaluate each cone using the same standards, leading to more objective results.
-
Recruit taste testers: Invite a diverse group of people to participate in the taste test. Select testers with different backgrounds and preferences to capture varied opinions. Aim for at least ten participants to gather a robust range of feedback. This diversity increases the reliability of the findings.
-
Record feedback systematically: Ensure that each tester tries one cone at a time and fills in the scoring sheet after each sample. Encourage them to take notes on their thoughts about each cone’s flavor and texture. Collect all completed sheets to compile scores and comments for analysis.
-
Analyze the results: Calculate the average scores for each cone based on the testers’ feedback. Identify which cone received the highest overall score in each category. Look for trends in comments regarding flavor preferences and texture experiences, which can provide valuable insights for choosing the top cone.
-
Consider repeat testing: Optionally, consider conducting a second round of testing with the top contenders. This repeat testing can confirm the initial results and ensure consistency in the taste experiences reported by testers.