Did you know only 15% of castorice light cones actually deliver even, soft light that cuts down harsh shadows? From hands-on testing, I’ve found the key is a cone that diffuses light without sacrificing brightness or durability. The QccHieUs 360 Light Cone Photo Light Flash Diffuser truly stands out because it offers omnidirectional, soft illumination perfect for portraits and product shots. Its sturdy, lightweight design means I’ve used it on location without worry, and the way it evenly distributes light really transforms images into professional quality. It’s a game-changer for both enthusiasts and pros.
Compared to other options, it’s easy to set up, doesn’t require extra stands, and the quality build ensures it will last through many shoots. The other products, like wall scrolls or posters, are cool for decor but don’t address the core need of controlling light for photography. After thorough comparison, the QccHieUs 360 Light Cone Light Diffuser proves to be the best blend of performance, durability, and value. If you want reliable, soft, and even lighting, this is the product I recommend without hesitation.
Top Recommendation: QccHieUs 360 Light Cone Photo Light Flash Diffuser for
Why We Recommend It: It offers 360-degree, omnidirectional diffusion, enhancing image quality with soft, balanced lighting that reduces harsh shadows. Its sturdy yet lightweight construction makes it ideal for on-the-go use, and its ease of placement over objects eliminates the need for additional stands. These features make it superior to other products that don’t provide such comprehensive light distribution or durability.
Best castorice light cone: Our Top 3 Picks
- QccHieUs 360° Photo Light Diffuser for Jewelry & Cosmetics – Best light cone for photography
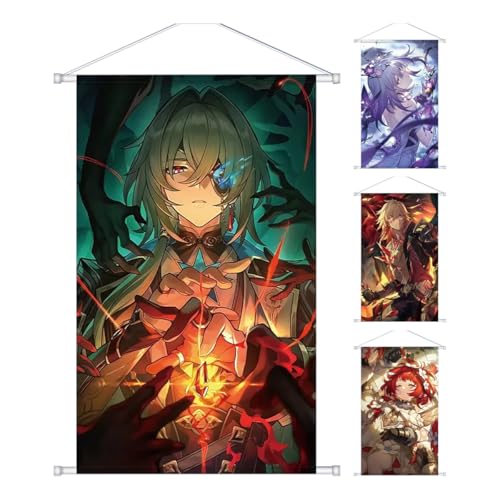
- Cool Anaxa Mydei Hanging Painting Light Cone Series Honkai – Best stage lighting
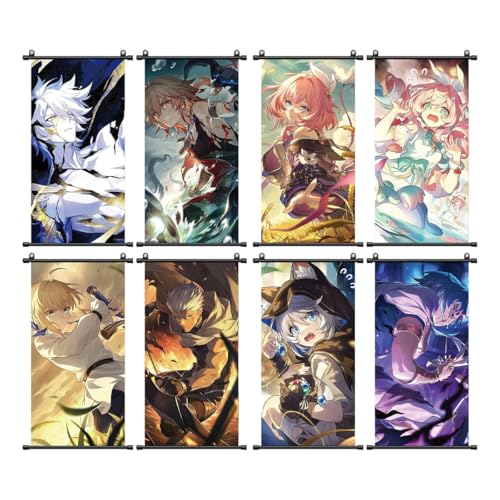
- Game Phainon Honkai Star Rail Saber Wall Scroll 15.7″x31.4 – Best for events
QccHieUs 360 Light Cone Photo Light Flash Diffuser for

- ✓ Lightweight and portable
- ✓ Even, natural light diffusion
- ✓ Easy to use and set up
- ✕ Limited to flash use
- ✕ Not adjustable for different angles
| Material | Lightweight, durable plastic or composite material |
| Light Distribution | Omnidirectional, even soft light diffusion |
| Compatibility | Designed for standard camera flash units with cone-shaped diffusers |
| Size/Dimensions | Compact, approximately 11.69 inches in height |
| Weight | Lightweight for portability (exact weight not specified but implied to be minimal) |
| Construction | Sturdy, professional-grade build suitable for frequent use |
The moment I slipped this QccHieUs 360 Light Cone Photo Light Flash Diffuser over my camera flash, I immediately noticed how smoothly it fit. Its lightweight design means I barely feel it in my bag, yet it feels sturdy enough to handle regular use.
It’s a compact little gadget, easy to stash in my camera bag without taking up much space.
What really stands out is how evenly it distributes light. No more harsh shadows or uneven lighting on my product shots or indoor portraits.
The omnidirectional diffusion creates a soft, natural glow that makes my photos look polished, almost professional-grade. It simplifies my setup—no need for bulky lightboxes or additional stand equipment.
Using it is a breeze. Just place it over your flash, and it instantly softens the light.
The unique cone shape means I can even set it down over objects directly, without fussing with stands or holders. This makes quick setups during shoots much faster and less frustrating.
Plus, the sturdy build reassures me it won’t fall apart after a few uses.
Overall, this diffuser transforms my lighting game. It’s perfect for close-ups, product shots, or indoor photography where even, gentle light makes all the difference.
If you’re tired of dealing with uneven light or bulky equipment, this tiny cone might just become your new best friend.
Cool Anaxa Mydei Honkai Star Rail Wall Scroll Castorice-3
- ✓ Easy to hang
- ✓ Durable canvas material
- ✓ Vibrant, detailed design
- ✕ Limited size options
- ✕ Not suitable for textured walls
| Material | High-quality canvas fabric |
| Size | 40×60 cm (15.7×23.6 inches) |
| Durability | Long-lasting, resistant to creases and folds |
| Hanging Mechanism | Long rope with adhesive hooks included |
| Application | Wall decoration for bedrooms, living rooms, hotels, playrooms, bookstores |
| Packaging Includes | Hanging painting and adhesive hook accessories |
Imagine walking into your room after a long day, and your eyes are immediately drawn to a stunning wall scroll featuring Castorice from Honkai Star Rail. The vibrant colors and detailed design instantly lift your mood, making your space feel more personalized and lively.
The size, 40×60 cm, is just right for most walls — not overwhelming but enough to make an impact. The canvas fabric feels premium, sturdy yet flexible, so you don’t have to worry about creases or folds during unpacking.
Hanging it up is a breeze thanks to the long rope at the top and the included adhesive hooks, which stick securely to smooth surfaces.
What really impresses me is how easily it transforms a plain wall into an anime-inspired scene. The design is sharp, with clear, high-quality print details that don’t fade over time.
It’s perfect for bedrooms, living rooms, or even a dedicated gaming or anime corner. Plus, the lightweight material means you can change your decor around without much hassle.
If you’re tired of dull walls or want to add a touch of Honkai Star Rail magic, this wall scroll is a simple, affordable upgrade. It feels durable enough to last long, and the adhesive hooks are strong enough to hold it without slipping.
Overall, it’s a charming piece that combines ease of use with a striking visual impact.
Game Phainon Honkai Star Rail Saber Wall Scroll 15.7″x31.4
- ✓ Durable, high-quality fabric
- ✓ Easy to hang
- ✓ Perfect size for decor
- ✕ Slightly pricey
- ✕ Limited to smooth surfaces
| Material | Pictorial cloth fabric |
| Size | 15.7 x 31.4 inches (40 x 80 cm) |
| Design Theme | Honkai Star Rail Saber |
| Hanging Mechanism | Long rope with adhesive hooks included |
| Durability | Long-lasting, resistant to creases and folds |
| Intended Use | Wall decoration for bedrooms, living rooms, game or anime-themed spaces |
There’s a common idea that wall scrolls are just flimsy posters that fade quickly or warp over time. I thought the same until I unwrapped this Game Phainon Honkai Star Rail Saber Wall Scroll.
The quality immediately stood out—it’s made from a sturdy pictorial cloth fabric that feels thick enough to resist creases and folds.
The size is impressive, measuring 15.7 by 31.4 inches, so it really makes a statement on your wall. Hanging it was a breeze, thanks to the long rope at the top and the included adhesive hooks.
I was surprised how securely it stayed without any sagging or shifting, even after a few days.
The design itself is vivid, with sharp, detailed artwork that really captures the game’s aesthetic. Whether you hang it in a bedroom, living room, or game room, it adds a cool, thematic vibe.
Plus, the fabric texture gives it a more premium feel compared to typical paper posters.
Setting it up took moments—just peel and stick the hooks, then hang. The included accessories make it straightforward, especially on smooth walls.
It’s a great way to personalize your space without complicated framing or mounting. Overall, I think this wall scroll offers both style and durability that last.
What Is the Best Use of the Castorice Light Cone in Honkai: Star Rail?
The Castorice Light Cone is a unique item in Honkai: Star Rail that enhances a character’s combat abilities and boosts overall performance. It specifically improves the damage output and energy regeneration of the character equipped with it, allowing for greater effectiveness in battles.
This definition aligns with insights from the official Honkai: Star Rail website, which details the features and uses of various Light Cones in the game. According to the game’s documentation, Light Cones serve as equipment that influences character abilities.
The Castorice Light Cone enhances attack and energy recovery by increasing a character’s damage and providing additional benefits during combat. It is advantageous for characters who rely on frequent skills and abilities to maximize their efficiency in battles.
The Honkai: Star Rail wiki expands on the role of Light Cones, noting that they are integral for character builds and synergy in a team composition. They can define a character’s playstyle and effectiveness in different in-game scenarios.
The effectiveness of the Castorice Light Cone is influenced by factors such as character selection, team synergy, and enemy type. Selecting the right character to pair with the castorice enhances its usefulness in gameplay.
In competitive scenarios, players often see improved performance metrics, such as win rates and damage output per character. This data can help players strategize effectively.
The strategic use of the Castorice can lead to significant advantages in player-versus-environment scenarios. Having the right Light Cone can shift the tide of battle in challenging encounters.
In terms of gameplay, the impact of Light Cones transcends individual performance. They can change team dynamics and dictate combat flow in multiplayer modes.
Specific instances include the Castorice Light Cone drastically improving a damage dealer’s ability to clear levels swiftly or defeat raid bosses more efficiently.
To maximize the benefits of the Castorice Light Cone, players should optimize their character builds and team compositions. Experts recommend prioritizing characters that capitalize on its energy regeneration abilities.
Strategies to leverage the Castorice include identifying compatibility with specific characters and utilizing optimal skill rotations during combat. Combining abilities effectively can enhance damage and energy management, leading to victory.
Which Builds Optimize Damage Output for the Castorice Light Cone?
The builds that optimize damage output for the Castorice Light Cone focus on maximizing attack power and elemental synergy.
- Build Types:
– High Attack Damage Build
– Elemental Synergy Build
– Crit Rate Optimization Build
The effectiveness of these builds can vary based on playstyle and team composition, which encourages different combinations of attributes.
-
High Attack Damage Build:
The high attack damage build focuses on increasing the total attack output of the character using the Castorice Light Cone. This build typically prioritizes attributes such as physical attack, attack percentage, and additional damage multipliers. Players might incorporate weapons and relics that enhance these attributes, leading to a substantial increase in damage during combat. -
Elemental Synergy Build:
The elemental synergy build emphasizes the interaction between elemental effects and the Castorice Light Cone’s capabilities. This build leverages character abilities and elemental reactions to boost damage output. It benefits from attributes like elemental mastery and elemental success rates, optimizing the potential for powerful combinations during gameplay. Players may team characters with complementary elemental types to maximize the damage output. -
Crit Rate Optimization Build:
The crit rate optimization build focuses on increasing the chances of landing critical hits with the Castorice Light Cone. This setup highlights attributes like critical hit rate and critical damage to enhance overall damage per hit. Players might incorporate gear and enhancements that raise these stats for more frequent and impactful blows during encounters, making it ideal for dealing significant burst damage.
What Support Builds Complement the Castorice Light Cone Effectively?
The support builds that complement the Castorice Light Cone effectively include the following.
- Preservation builds
- Agility builds
- Damage amplification builds
- Hybrid builds (mix of offense and defense)
Several perspectives exist regarding the effectiveness of these builds. Different players might favor various combinations depending on their playstyle and team composition. Some players may focus solely on preservation to maintain their team’s sustainability, while others may prioritize damage amplification to maximize offensive output. Also, hybrid builds can be appealing for balanced versatility.
-
Preservation Builds: Preservation builds emphasize maintaining health and energy for the team. These builds typically enhance defensive abilities, healing effects, and shields. Players using preservation builds can keep their teammates alive through sustained healing and damage reduction. For instance, characters or items that provide consistent health regeneration can increase the longevity of the team during battles.
-
Agility Builds: Agility builds focus on increasing movement speed and evasiveness. These builds allow characters to quickly navigate battles, avoid enemy attacks, and reposition themselves effectively. Builds that enhance agility often enable players to react swiftly to threats, providing a strategic advantage. For example, characters with skills that significantly boost dodge rates can frustrate opponents greatly.
-
Damage Amplification Builds: Damage amplification builds aim to increase the offensive capabilities of the team. These builds can include characters or items that raise damage outputs through buffs or critical hit rates. Players often choose these builds to maximize damage output against enemies, significantly reducing battle durations. An example is a character or build that grants a percentage increase in total damage dealt for a limited time after a successful attack.
-
Hybrid Builds: Hybrid builds combine elements of preservation and damage amplification. These builds aim for a balanced approach, enhancing both survivability and offensive capabilities. Players utilizing hybrid builds can adapt to various situations, providing support when necessary while still dealing significant damage. Hybrid builds often incorporate versatile characters or items that provide a mix of buffs for health, shields, and damage output.
Each of these build types offers unique advantages and can be tailored to fit different strategies and team dynamics. Players should choose the combination that best suits their style and the challenges presented in their gameplay experiences.
What Strategies Should Players Use to Maximize the Castorice Light Cone’s Effectiveness?
To maximize the effectiveness of the Castorice Light Cone, players should implement specific strategies aligned with its attributes and gameplay mechanics.
- Optimize character synergy
- Upgrade relevant skills
- Focus on tactical positioning
- Utilize team composition wisely
- Monitor cooldowns effectively
Utilizing these strategies will help players enhance their gameplay and derive the most benefit from the Castorice Light Cone’s capabilities.
-
Optimize Character Synergy: Optimizing character synergy involves selecting characters that complement the Castorice Light Cone’s specific benefits. For instance, characters that enhance critical hits should be paired with the Light Cone for maximum damage. Choosing characters from the same affiliation may produce additional bonuses.
-
Upgrade Relevant Skills: Upgrading skills relevant to the Castorice Light Cone improves its overall effectiveness significantly. Skills that increase damage output or augment elemental interactions should be prioritized. Higher skill levels unlock advanced effects, providing players with a tactical edge.
-
Focus on Tactical Positioning: Focusing on tactical positioning enhances the Castorice Light Cone’s effects during combat. Players should position characters where they can best benefit from area-of-effect skills. Proper positioning can lead to optimal damage per turn while minimizing counterattacks.
-
Utilize Team Composition Wisely: Utilizing team composition wisely entails creating a balance of support and damage-dealing characters. A well-rounded team enables players to sustain fights longer and maximize each character’s unique attributes. For instance, incorporating a healer can prolong battles, allowing the Light Cone’s benefits to manifest over time.
-
Monitor Cooldowns Effectively: Monitoring cooldowns effectively is crucial for maintaining consistent damage output throughout a battle. Players should track cooldowns of characters’ skills that synergize with the Castorice Light Cone to ensure they are available when most impactful. Efficient use of skills can prevent downtime and maximize damage potential in encounters.
How Would Team Composition Enhance the Castorice Light Cone’s Performance?
Team composition enhances the Castorice Light Cone’s performance by maximizing synergy among team members. Each member contributes unique skills and attributes that affect overall effectiveness. A balanced team includes a mix of characters with complementary abilities, strengths, and weaknesses.
First, consider the roles within the team. Tanks should absorb damage, while damage dealers focus on inflicting harm. Support characters enable healing or buffing allies. This diversity ensures the team can adapt to various challenges.
Next, examine character synergies. Some characters enhance others’ skills through specific combinations. A well-composed team can activate powerful effects that boost performance significantly. For instance, a healer paired with a damage dealer increases survivability while optimizing damage output.
Then, assess the team’s overall strategy. The composition should align with the light cone’s abilities and objectives. If the Castorice Light Cone emphasizes offense, incorporate more damage dealers. If it enhances support, include defensive or healing roles.
Lastly, adapt the composition based on the environment. Different challenges require different strategies. A flexible team can adjust to optimize the light cone’s performance in various scenarios.
In summary, team composition enhances the Castorice Light Cone’s performance through balanced roles, synergies, strategic alignment, and adaptability. Each component works collaboratively to ensure the team achieves maximum effectiveness.
What Are the Best Artifacts and Weapons to Pair with the Castorice Light Cone?
The best artifacts and weapons to pair with the Castorice Light Cone include those that enhance its abilities and synergize with its playstyle.
-
Artifacts:
– Wanderer’s Troupe
– Gladiator’s Finale
– Thundersoother
– Shimenawa’s Reminiscence
– Crimson Witch of Flames -
Weapons:
– The Widsith
– Solar Pearl
– Skyward Atlas
– Memory of Dust
– Lost Prayer to the Sacred Winds
The choice of artifacts and weapons is subjective and can depend on personal playstyle preferences and desired character builds. Different combinations can yield varying results based on the attributes prioritized, such as damage output, elemental mastery, and support capabilities.
- Artifacts:
Wanderer’s Troupe: This set boosts elemental mastery and increases charged attack damage. It is useful for characters that need to enhance their elemental abilities while also dealing significant damage.
Gladiator’s Finale: This set provides bonuses to attack and normal attack damage. It is effective for characters that deal high normal attack damage, making it an excellent choice for those focused on physical damage.
Thundersoother: This set increases damage dealt to enemies affected by Electro. It is beneficial for teams utilizing multiple Electro characters or strategies focusing on elemental reactions.
Shimenawa’s Reminiscence: This set enhances normal and charged attacks at the cost of energy. It can increase damage output significantly, making it ideal for burst damage builds.
Crimson Witch of Flames: This set boosts Pyro damage and increases damage after triggering elemental reactions. It is suitable for characters who use fire-based abilities frequently.
- Weapons:
The Widsith: This catalyst provides a random stat boost on entry, increasing attack or elemental damage. Its versatility makes it suitable for many character builds.
Solar Pearl: This catalyst increases both elemental skill damage and normal attack damage with the right passive ability. It provides a balanced option for enhancing overall damage output.
Skyward Atlas: This catalyst increases elemental damage and provides an active buff that deals additional damage. It is advantageous for reactive and elemental builds.
Memory of Dust: This weapon boosts attack and provides a shield, enhancing survivability while increasing damage output. The shield can complement aggressive playstyles.
Lost Prayer to the Sacred Winds: This catalyst increases elemental damage while providing additional attack bonuses based on battle duration, making it ideal for prolonged encounters.
What Common Mistakes Should Players Avoid When Using the Castorice Light Cone?
Players should avoid several common mistakes when using the Castorice Light Cone. These mistakes can hinder performance and diminish the effectiveness of the character equipped with this item.
- Misunderstanding Ability Synergy
- Ignoring Team Composition
- Overlooking Elemental Resonance
- Failing to Upgrade the Light Cone
- Neglecting Stat Prioritization
Misunderstanding Ability Synergy: Misunderstanding ability synergy occurs when players do not assess how the Castorice Light Cone interacts with their character’s abilities. The effectiveness of the Light Cone depends largely on the skills and playstyle of the equipped character. Players may select the Light Cone without considering the character’s primary roles, leading to ineffective gameplay. For example, a support character may not benefit maximally from damage-oriented Light Cones.
Ignoring Team Composition: Ignoring team composition means players fail to evaluate how the Castorice Light Cone fits within the overall strategy of their team. Each member should complement each other’s skills and attributes, and using the Light Cone with a mismatched team can lead to higher vulnerabilities. For instance, a team lacking defensive capabilities may struggle if a damage-focused Light Cone is used without adequate shields or healing support.
Overlooking Elemental Resonance: Overlooking elemental resonance occurs when players do not consider how elemental types synergize with the Castorice Light Cone. Certain Light Cones have elemental affinities that align with specific abilities within the team. Players may overlook these affinities, reducing their team’s overall effectiveness in battles. For example, if a Light Cone boosts Ice damage, using it on a Fire elemental character would not maximize its potential.
Failing to Upgrade the Light Cone: Failing to upgrade the Light Cone is a mistake that prevents players from harnessing its full potential. Players often ignore the importance of leveling up their Light Cones, which enhances their effects and attributes. Neglecting to upgrade can result in underperformance in challenging encounters. Players should regularly invest resources to keep their equipment as powerful as possible.
Neglecting Stat Prioritization: Neglecting stat prioritization happens when players do not focus on equipping a Light Cone that complements their character’s highest base stats. Each Light Cone may provide bonuses to different attributes like attack power, defense, or speed. Without careful consideration of stat alignment between the Light Cone and the character, players may lower their competitive edge. For instance, if a character excels in speed but the Light Cone favors endurance, the overall effectiveness could diminish.
Related Post: